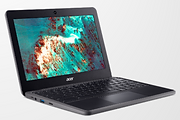
Chromebook Setup
Congratulations on your new Chromebook!
We hope that you will enjoy your Tech Goes Home course and learn how to use your Chromebook and the Internet for work, school, and play! Below are videos and instructions on how to set up your Chromebook. If you are using a hotspot for your internet service you will find instructions for that as well.
Check out our COVID-19 Resources page for useful websites and apps.


Chromebook Set Up
This video will walk you through what to do when you open your Chromebook for the first time. It explains how to log into the Chromebook and what the setup options are. Once you're logged in, it'll give you a short introduction to your app launcher and show you how to access all your settings. You'll learn how to connect your wifi, change your wallpaper, and other commonly used settings.
This tutorial will give you written instructions on how to set up your Chromebook and where to find your settings and files. This is a PDF file that may open in your browser or download to your device.
Este tutorial le dará instrucciones escritas sobre cómo configurar su Chromebook por primera vez y dónde encontrar su configuración y archivos. Este es un archivo PDF que puede abrirse en su navegador web o descargarse en su teléfono, tableta o computadora.
This tutorial will give you written instructions on how to set up your Chromebook and where to find your settings and files. This is a PDF file that may open in your browser or download to your device.
سيوفر لك هذا البرنامج التعليمي تعليمات مكتوبة حول كيفية إعداد جهاز Chromebook لأول مرة ومكان العثور على إعداداته وملفاته. هذا ملف PDF يمكن فتحه في متصفح الويب الخاص بك أو تنزيله على هاتفك أو جهازك اللوحي أو الكمبيوتر.
本教程將為您提供有關如何首次設置Chromebook以及在何處可以找到其設置和文件的書面說明。 這是一個PDF文件,可以在您的Web瀏覽器中打開或下載到您的手機,平板電腦或計算機上。
This official Google Website has lots of great instructional videos on how to do things on your Chromebook. Learn how to download apps, take screenshots, open and edit pictures, watch Netflix when you're not connected to internet and more!
This is the official Chromebook Help Center by Google. This website includes instructions on how to connect your Chromebook, manage your apps, customize settings, explore accessibility, fix problems, and find device support.

Comcast provides low-cost internet to eligible individuals (includes families with public school students). Once you are an Internet Essentials customer, you have the option to purchase a laptop or desktop computer at a discounted price.
Message from Comcast: "We have a massive backlog of calls as our volume is unprecedented. We are trying to get this message out to people as much as possible that the simplest, fastest, and easiest way to apply for the program is from their mobile device at www.InternetEssentials.com"
If you are unable to pay for internet at this time and are registering for a TGH course, you can apply for a TGH Sponsored Internet Essentials account. Contact your instructor to see if you qualify. If you do not qualify for Internet Essentials, you can apply for a TGH Sponsored Mobile Hotspot.
If you were provided an Internet Essentials account sponsored by TGH, use the video below to sign up.

R910 Mobile Hotspot (through Franklin Wireless)
The 910 Hotspot that was provided by TGH is serviced through Franklin Wireless.
For issues with service call Franklin Wireless at 1-800-959-3558 for Customer Service in English & Spanish. For more information go to www.franklinwireless.com/support/contact-us
This is the official manual for the R910 Hotspot. This is a PDF file that may open in your browser or download to your device.
This file includes the written instructions below.
R910 Hotspot Instructions
1. Plug in the AC adaptor to the wall outlet and the MicroUSB in the MicroUSB port.

2. The indicator light on the power button illuminates red when charging starts. It may take up to three hours to fully charge the battery. The light will turn green when the device is fully charged.
3. To turn on the device, press and hold the Power button until the device displays "Welcome" on the screen.

4. Find your Wi-Fi login.
-
Once your device is completely powered on, the Wi-Fi Name and Password are shown on the display in the yellow area.
-
The Wi-Fi name and password are also available in the “Wi-Fi” Menu. To get to the “Wi-Fi” Menu. Press the “Right” or “Left” buttons until the Wi-Fi menu icon is blue. Then click on the “Select” button to see the information.


5. You can now connect your computer, tablet, and phones to this wifi signal.
-
If you are setting up your Chromebook for the first time, go to the Chromebook Setup instructions now and the Chromebook will ask you for your hotspot wifi information during setup.
-
If your Chromebook is already set up go to the WIFI setting on your Chromebook and select the WIFI signal from your hotspot. Once your Chromebook connects to the WIFI signal from the hotspot, you will be prompted to enter the Password. Once you type in the password your Chromebook will connect to your hotspot's WIFI signal and you will be able to get online.
6. When your connection is successful, you should see an icon on your hotspot. The number indicates the number of devices connected to your R910. You can also check the devices section of the menu to see details about the connected devices.

7. To turn off your hotspot, press and hold the Power button until the device displays "Goodbye"
Troubleshooting Notes:
-
If your hotspot is turned on but the screen is off, you can press any of the buttons on the hotspot to activate the screen.
-
To reset your device settings to factory default first turn ON your hotspot. Then press the reset button which is located on the backside of the device after the battery cover is removed.
-
If your device will not turn on or off using the Power button, remove and re-insert the battery, then press and hold the power button again. Restarting your device does not reset the device settings.

R850 Mobile Hotspot (through Franklin Wireless)
The R850 Hotspot that was provided by TGH is serviced through Franklin Wireless.
For issues with service call Franklin Wireless at 1-800-959-3558 for Customer Service in English & Spanish. For more information go to www.franklinwireless.com/support/contact-us
This is the official manual for the R850 Hotspot. This is a PDF file that may open in your browser or download to your device.
This file includes the written instructions below.
Este archivo incluye las instrucciones escritas a continuación en español.
Dosye sa a gen ladan enstriksyon ekri anba a.
R850 Hotspot Instructions

1. Plug in the AC adaptor to the wall outlet and the MicroUSB cable in the charging port.

2. The indicator light on the power button illuminates red when charging starts. It may take up to three hours to fully charge the battery. The light will turn green when the device is fully charged.
3. To turn on the device, press and hold the Power button until the device displays "Welcome" on the screen.

4. Your device's Wi-Fi function automatically turns on once the device is powered up completely.
5. You can now connect your computer, tablet, and phones to this wifi signal.
-
If you are setting up your Chromebook for the first time, go to the Chromebook Setup instructions now and the Chromebook will ask you for your hotspot wifi information during setup.
-
If your Chromebook is already set up go to the WIFI setting on your Chromebook and select the WIFI signal from your hotspot. Once your Chromebook connects to the WIFI signal from the hotspot, you will be prompted to enter the Password. Once you type in the password your Chromebook will connect to your hotspot's WIFI signal and you will be able to get online.
6. To turn off your hotspot, press and hold the Power button until the device displays "Goodbye".
Troubleshooting Notes:
-
To reset your device settings to factory default first turn ON your hotspot. Then press the reset button which is located on the backside of the device after the battery cover is removed.
-
If your device will not turn on or off using the Power button, remove and re-insert the battery, then press and hold the power button again. Restarting your device does not reset the device settings.

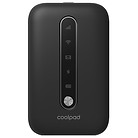
Coolpad Surf (through Mobile Citizen) Hotspot Set Up
This is the official manual for the Coolpad Surf Hotspot. This is a PDF file which may open in your browser or download to your device.
This file includes the written instructions below.
Coolpad Surf Hotspot Instructions
1. Open the back cover to check that the battery is installed and to get your Wifi information.
-
Turn the hotspot faced down.
-
Locate the notch on the bottom left-hand corner.
-
Use your nail or thin flat object to detach the corner of the cover
-
Then lift off the rest of the cover to release it.

2. Check that your battery is installed. If not, install it as pictured.
3. Locate your Wifi information on the inside of the back cover.
On a piece of paper write down
-
the SSID
(the name of your wifi network) -
and the password.

4. When you’re done, place the back cover back onto your hotspot.
5. Connect the MicroUSB cable to the USB port at the bottom of your device.
6. Connect the other end to the travel adapter.
7. Connect the travel adapter to an electrical outlet and fully charge your device.

8. When fully charged disconnect your charging cable from the wall and the hotspot.
9. To turn on the hotspot press and hold the Power Button for 3 seconds.
11. You can now connect your computer, tablet, and phones to this wifi signal.
12. Download this tutorial PDF to see how to read the LED indicators.


ZTE Warp Connect (through Sprint) Hotspot Set Up
This is the official manual for the ZTE Hotspot. This is a PDF file that may open in your browser or download to your device.
This file includes the written instructions below.
ZTE Warp Connect HOTSPOT Instructions
1. Connect the power cord to the device and plug it into the outlet.

2. To turn on the hotspot press and hold the Power Button (Button #7 in the diagram below).

3. Once the device turns on you will see "Sprint Hotspot" on the display.
4. To find the password for the hotspot, press the Function Button 2 times. (Button #6 in the diagram above.) This will bring you to the Menu.
5. Scroll to the option "Device Info" by pressing the Function Button (#6).
6. When "Device Info" is highlighted, press the Power Button (#7) to enter.
7. This will bring up the hotspot information. The first line on the display is the name of the WIFI signal from your hotspot. You will also see the password.
8. If you are setting up your Chromebook for the first time, go to the Chromebook Setup instructions now and the Chromebook will ask you for your hotspot wifi information during set up.
9. When you are done using the hotspot you can power off the hotspot by holding down the power button (#7).
10. If your Chromebook is already set up go to the WIFI setting on your Chromebook and select the WIFI signal from your hotspot. Once your Chromebook connects to the WIFI signal from the hotspot, you will be prompted to enter the Password. Once you type in the password your Chromebook will connect to your hotspot's WIFI signal and you will be able to get online. For more detailed instructions and pictures of this process, view steps 10-15 in this PDF file.

Jetpack MiFi 8800Li (through Sprint) Hotspot Setup
This is the official manual for the ZTE Hotspot. This is a PDF file that may open in your browser or download to your device.
This file includes the written instructions below.
Jetpack MiFi 8800Li HOTSPOT Instructions
1. Most Jetpacks come with the SIM card and battery already installed!
If you want to make sure that the battery and sim card is installed remove the back cover. Remove the battery to see the sim card. Insert sim card if needed by sliding it into the Sim Card slot. Align the gold contacts on the battery with the gold contacts on the Jetpack and gently slide the battery into place. Then replace the cover by setting it on the Jetpack where the notches align, then press on the cover until it clicks into place on all sides.

2. Connect the power cord to the device using the USC-C Port (#4 in the diagram below) and plug it into the outlet. Wait until the battery is completely charged.


3. When the battery is completely charged then hold down the Power Button (button #1 in the diagram above) for 3 seconds to turn the device on.
4. Installation will occur automatically and make take several minutes to complete.
5. When the installation is complete you will see the welcome screen.
6. Tap the information button on the screen.

7. This will bring up the hotspot information. You will see the name of the WIFI signal from your hotspot and the password.
8. If you are setting up your Chromebook for the first time, go to the Chromebook Setup instructions now and the Chromebook will ask you for your hotspot wifi information during set up.
9. When you are done using the hotspot you can power off the hotspot by holding down the power button (#1) for 3 seconds.
10. If your Chromebook is already set up go to the WIFI setting on your Chromebook and select the WIFI signal from your hotspot. Once your Chromebook connects to the WIFI signal from the hotspot, you will be prompted to enter the Password. Once you type in the password your Chromebook will connect to your hotspot's WIFI signal and you will be able to get online. For more detailed instructions and pictures of this process, view steps 10-15 in this PDF file.
ZOOM
Ask your TGH instructor if they are using Zoom for your course. If they are follow these instructions to download and set up Zoom on your Chromebook. You will need a Meeting ID or Meeting Link from your instructor before you can join the course.
Google Meet
Ask your TGH instructor if they are using Google Meet for your course. If they are following these instructions to learn how to use Google Meet on any computer, phone, or tablet. You will need a Google Meet Link from your instructor before you can join the course.

Selecting Internet Service Once your TGH-paid Internet Expires.
TGH will provide 1 year of paid internet service for all program graduates. Once your TGH-paid internet expires, you can use our guide below to see options for purchasing your own internet service through Comcast Internet Essentials or through a hotspot by PCs for People, We also provide information for Hotspots through Boost Mobile, Metro PCS, T-Mobile, AT&T, and Verizon.